Anatomy of a framed conservation hive
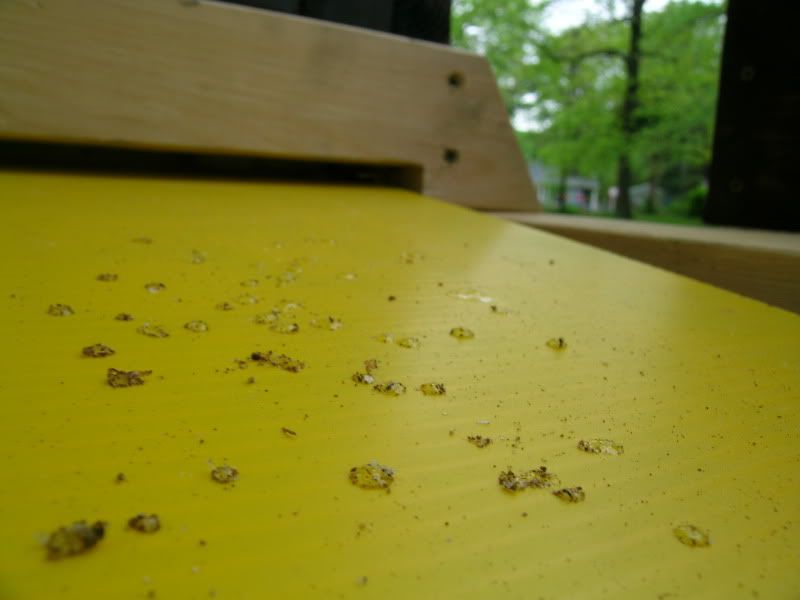
Apr. 18th, 2012 03:14 pm The conservation hive adapted to utilize standard frames begins, like most houses, with a basement. The basement is as simple as possible, built from reclaimed untreated 2x4 lumber with some aluminum ¼" channel screwed to either inside surface near the bottom to hold a simple sliding catchment drawer which I made from a sheet corrugated plastic, a reclaimed sign I found blowing down the road. This arrangement serves to make mite counts and much intuitive information can be gleaned from observations of the garbage that drops from a colony of bees. The pins driven partially into the inside perimeter are to support the mesh floor. That's about as technical as these hive designs get. I call it a basement because like most basements this too gets dark and scary and fills up with spiders, eventually. The conservation hive adapted to utilize standard frames begins, like most houses, with a basement. The basement is as simple as possible, built from reclaimed untreated 2x4 lumber with some aluminum ¼" channel screwed to either inside surface near the bottom to hold a simple sliding catchment drawer which I made from a sheet corrugated plastic, a reclaimed sign I found blowing down the road. This arrangement serves to make mite counts and much intuitive information can be gleaned from observations of the garbage that drops from a colony of bees. The pins driven partially into the inside perimeter are to support the mesh floor. That's about as technical as these hive designs get. I call it a basement because like most basements this too gets dark and scary and fills up with spiders, eventually. |
 The floor is a simple frame fashioned from 1x2 furring strips with a sheet of plastic needlepoint backing cut to fit and stapled into place, allowing hive junk to drop through. I've also used reinforced pet screening with some success as it's actually strong enough to deter skunks and other vermin from infiltrating the the brood nest in areas where that might be an issiue, but I prefer the needlepoint backing because it's a little more rigid than screen and, most importantly, it's cheap! The floor is a simple frame fashioned from 1x2 furring strips with a sheet of plastic needlepoint backing cut to fit and stapled into place, allowing hive junk to drop through. I've also used reinforced pet screening with some success as it's actually strong enough to deter skunks and other vermin from infiltrating the the brood nest in areas where that might be an issiue, but I prefer the needlepoint backing because it's a little more rigid than screen and, most importantly, it's cheap! |
 The next thing to go on is what I call the atrium, a place to locate the entrance above the floor and for bees to congregate inside the hive. The footprint of this piece and everything above it is an inch shy in length and width of the dimensions of the basement, not only as a aesthetic consideration but also, when centered, helps stabilize the floor. I consider this two part base to be an improvement over the one-piece basements I was making prior, if for no other reason they're easier to build. To complicate things a bit, I've built a couple of these with a series of dowels or slats laid cross-ways in rebates along the top inner edge, after the concept of the slatted rack of conventional woodenware that supposedly improves ventilation when used in conjunction with a screened floor. We'll see, I'd like to run a couple of those configurations in the field before I go building them. The next thing to go on is what I call the atrium, a place to locate the entrance above the floor and for bees to congregate inside the hive. The footprint of this piece and everything above it is an inch shy in length and width of the dimensions of the basement, not only as a aesthetic consideration but also, when centered, helps stabilize the floor. I consider this two part base to be an improvement over the one-piece basements I was making prior, if for no other reason they're easier to build. To complicate things a bit, I've built a couple of these with a series of dowels or slats laid cross-ways in rebates along the top inner edge, after the concept of the slatted rack of conventional woodenware that supposedly improves ventilation when used in conjunction with a screened floor. We'll see, I'd like to run a couple of those configurations in the field before I go building them. The type of entrance that I have here, a series of three 7/8" holes drilled on 2" centers are perfectly adequate for a bustling hive and are easily closed off by inserting a simple wine cork. I've experimented with other types of entrances, from making one side 3/8" shorter than the regular 2x4 leaving a beespace-sized gap that can be further reduced using conventional methods, to interchangeable "inserts" with pre-configured entrances drilled into them. Three holes stopped fast with wine corks won out for the sake of simplicity and as Bruce Lee once said, "the height of cultivation always runs to simplicity." Make no mistakes - this is Kung Fu bee keeping! |
 Next is a box, a DIY version of the standard 8-frame medium pictured here with a full array of "frames" (mostly the top bar with a starter strip of milled foundation and side bars). Just as with the smaller frameless conservation hives, bees draw all their own comb. If this works I'll be buying supers, prefabricated, in the future and adapt the dimensions of the rest of the equipment to them. Next is a box, a DIY version of the standard 8-frame medium pictured here with a full array of "frames" (mostly the top bar with a starter strip of milled foundation and side bars). Just as with the smaller frameless conservation hives, bees draw all their own comb. If this works I'll be buying supers, prefabricated, in the future and adapt the dimensions of the rest of the equipment to them. |
 Another box! I've removed a couple frames from the center, hopefully, facilitating the bees to move downward (not only in direction but also a descent from free-range, feral, hippie bees to Dilbert-style, "cubicles-for-honeybees" frames) and this will be the first box they'll encounter into their progression into the "working bees" area of the hive. Last year I tried to integrate a couple of frameless boxes into framed hives without success and I've heard from other beekeepers, as well, that it can be tricky to convince them. Another box! I've removed a couple frames from the center, hopefully, facilitating the bees to move downward (not only in direction but also a descent from free-range, feral, hippie bees to Dilbert-style, "cubicles-for-honeybees" frames) and this will be the first box they'll encounter into their progression into the "working bees" area of the hive. Last year I tried to integrate a couple of frameless boxes into framed hives without success and I've heard from other beekeepers, as well, that it can be tricky to convince them. I can't say as to where I blame them. . . |
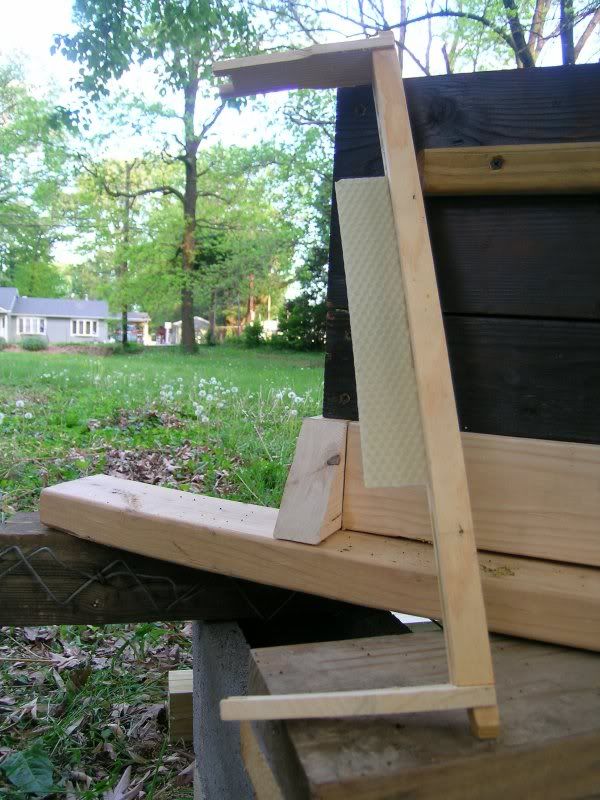
 After any supers comes the most makeshift piece - the adapter, or flange - a simple piece of 3/8" plywood cut so that the outside perimeter is larger than that of either the framed super or the frameless box, and the inside perimeter of the "hole" is smaller than either inside perimeter. If I get enough time to transition the brood nest out of the bait box before the sun, wind, and rain rot the flange to pieces I'll consider it a smashing success! After any supers comes the most makeshift piece - the adapter, or flange - a simple piece of 3/8" plywood cut so that the outside perimeter is larger than that of either the framed super or the frameless box, and the inside perimeter of the "hole" is smaller than either inside perimeter. If I get enough time to transition the brood nest out of the bait box before the sun, wind, and rain rot the flange to pieces I'll consider it a smashing success! |
 The adapter, in this case, is made to transition a colony out of the bait box that I captured a swarm in on Easter at my Dad's house in Bentonville. The floor of bait box is a thin, light panel of wood secured with a a bungie cord - nothing elaborate, minimal futzing about with stuff on a ladder. The bait box has the same footprint as the frameless conservation hives and it's designed to be dropped on top without the use of a flange. (KISS - keep it simple, stupid). After the colony has moved down I'll incorporate a crown board, a quilt, and a gabled roof just like the other conservation hives. The adapter, in this case, is made to transition a colony out of the bait box that I captured a swarm in on Easter at my Dad's house in Bentonville. The floor of bait box is a thin, light panel of wood secured with a a bungie cord - nothing elaborate, minimal futzing about with stuff on a ladder. The bait box has the same footprint as the frameless conservation hives and it's designed to be dropped on top without the use of a flange. (KISS - keep it simple, stupid). After the colony has moved down I'll incorporate a crown board, a quilt, and a gabled roof just like the other conservation hives. |
 So, that night I crept up on the bait box and wadded up a damp paper towel and stuffed it in the entrance and taped it shut. After moving the colony to the new location I un-bungied the floor and dropped them right on top, centered as best I could over the hole in the flange and, viola! My Easter apiary is complete. Except that's not exactly how it went down. . . So, that night I crept up on the bait box and wadded up a damp paper towel and stuffed it in the entrance and taped it shut. After moving the colony to the new location I un-bungied the floor and dropped them right on top, centered as best I could over the hole in the flange and, viola! My Easter apiary is complete. Except that's not exactly how it went down. . . When I turned back around to collect the floor panel there was a mass of bees, like a brick, like a little cake iced with living bees occupying the nasty chunk of brood comb that I had placed in the box the previous year as a lure, welded to the floor with propolis. In the dark I couldn't determine whether or not they began making stores there or if the queen had laid in it and, so, was a little fearful of scraping it up like burr comb and dumping it in the new hive, bees and all. It had a lot of bees on it, probably not the entire swarm but a lot! After a couple minutes of high-velocity worrying and bee-havioral speculation, I ended up taking the hive down again to the bottom-most box and placing the entire floor of the bait box vertically in the hive in place of the an outer frame. The arrangement extended upward into the next box so I tilted it some to allow it rest in the gap I left in the upper box, hoping the cluster would transition off of the board and up into the ceiling of the bait box where, I was hoping, the queen and the rest of the cluster was gathered. Residual honey on the catchment tray the next morning confirmed my suspicion that they'd at least used the old comb as an initial pantry, and probably had started a small patch of brood there, as well, and had spent the nighttime hours reconfiguring their nest to adapt to my remodeling. Now, I need to go back in a take the board out before it becomes a fixture but only after enough time has passed to allow the bees to settle in and feel at home. |